Raymii.org

Quis custodiet ipsos custodes?Home | About | All pages | Cluster Status | RSS Feed
Build a WeatherTerminal app for the Seeed reTerminal (with Qt 6 & QML)
Published: 02-04-2022 | Author: Remy van Elst | Text only version of this article
❗ This post is over three years old. It may no longer be up to date. Opinions may have changed.
Table of Contents
In this guide I'll show you how to build a weather app for the Seeed reTerminal using Qt and QML. Imagine the reTerminal in your entrance hallway and with just a quick glance at the screen you'll know what the weather will be the next few hours, if you need an umbrella, if you'll have a headwind on your bicycle ride or if it's just going to be clear and sunny. This tutorial builds on the reTerminal Yocto boot2qt distro we've built in the previous article and uses Qt 6. Qt is a C++ framework, but this Weather app will use QML almost exclusively. I'm using just QML to make the guide more accessible and also because I'm used to doing everything in C++, so a sidestep to QML is fun for me as well.
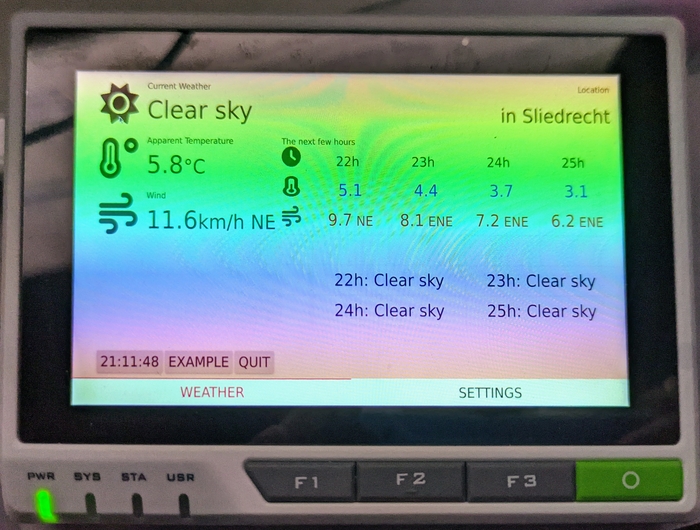
The finished WeatherTerminal
This is part 1 of the guide where we'll setup the basics. That includes networking via QML, parsing the Open Meteo JSON weather API in QML and displaying the Weather Code in QML. If you're new to Qt or C++, don't worry. QML is a declarative language for defining GUI's, but it includes JavaScript. This means that it's easy to layout your interface and have bits and pieces of JavaScript doing some of the heavy lifting, which in our case will be the network activity and JSON parsing. At the end of this guide you'll have a basic screen that converts a JSON API weather code to a textual representation and shows the current temperature, running on the reTerminal.
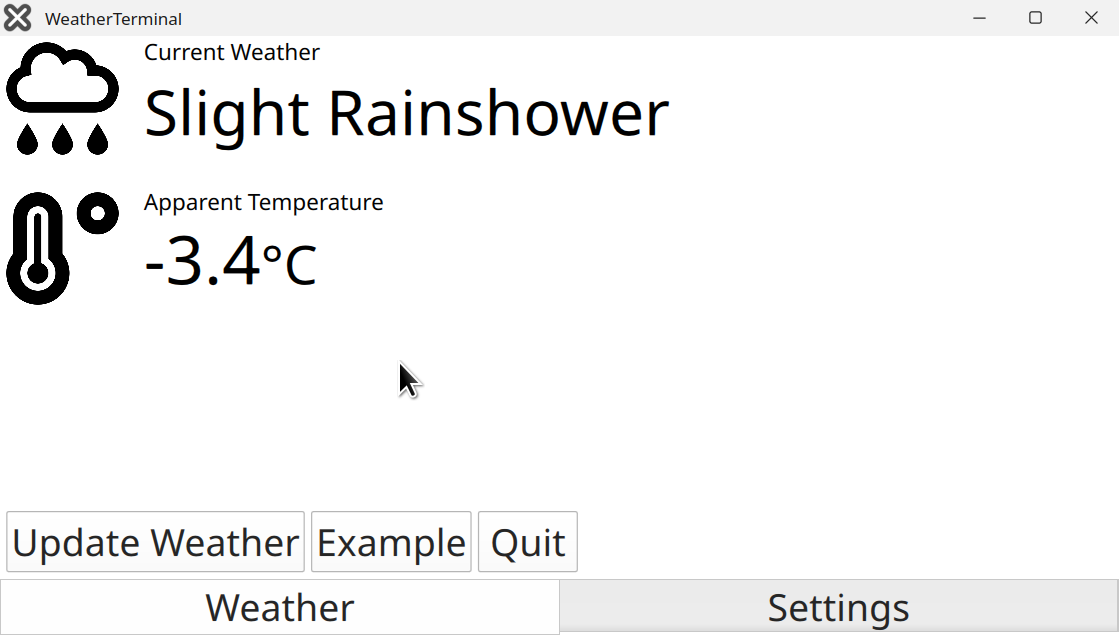
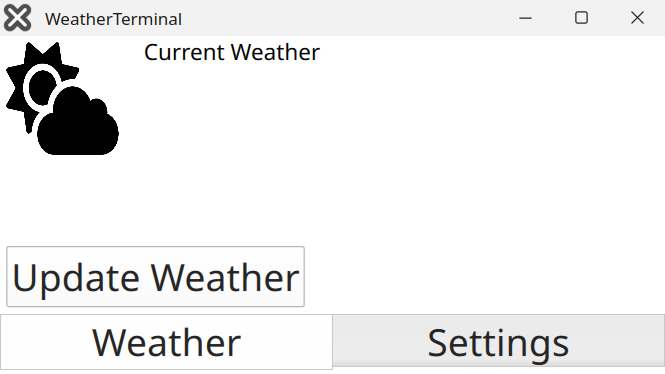
Here is a picture of the end result of part 1 running on my desktop:
Part 2 will extend the WeatherTerminal with user interface scaling (to run both on your PC and the reTerminal), persistent settings, a location picker, a refresh timer, more weather elements including a few hours into the future and cover more advanced QML concepts like different layouts, anchoring elements, conditionals, models and properties. Part 2 also includes the Qt Virtual Keyboard, since the reTerminal has no physical keyboard, but we do want to enter our location.
Part 2 isn't finished yet, once that's done I'll link it here.
Full disclosure: I was contacted by Seeed, they sent me this reTerminal in exchange for a few articles. No monetary payment is involved and Seeed has not reviewed this article before publishing. For official support, please visit the Seeed wiki.
The full source code for part 1 is on my github
What is the reTerminal
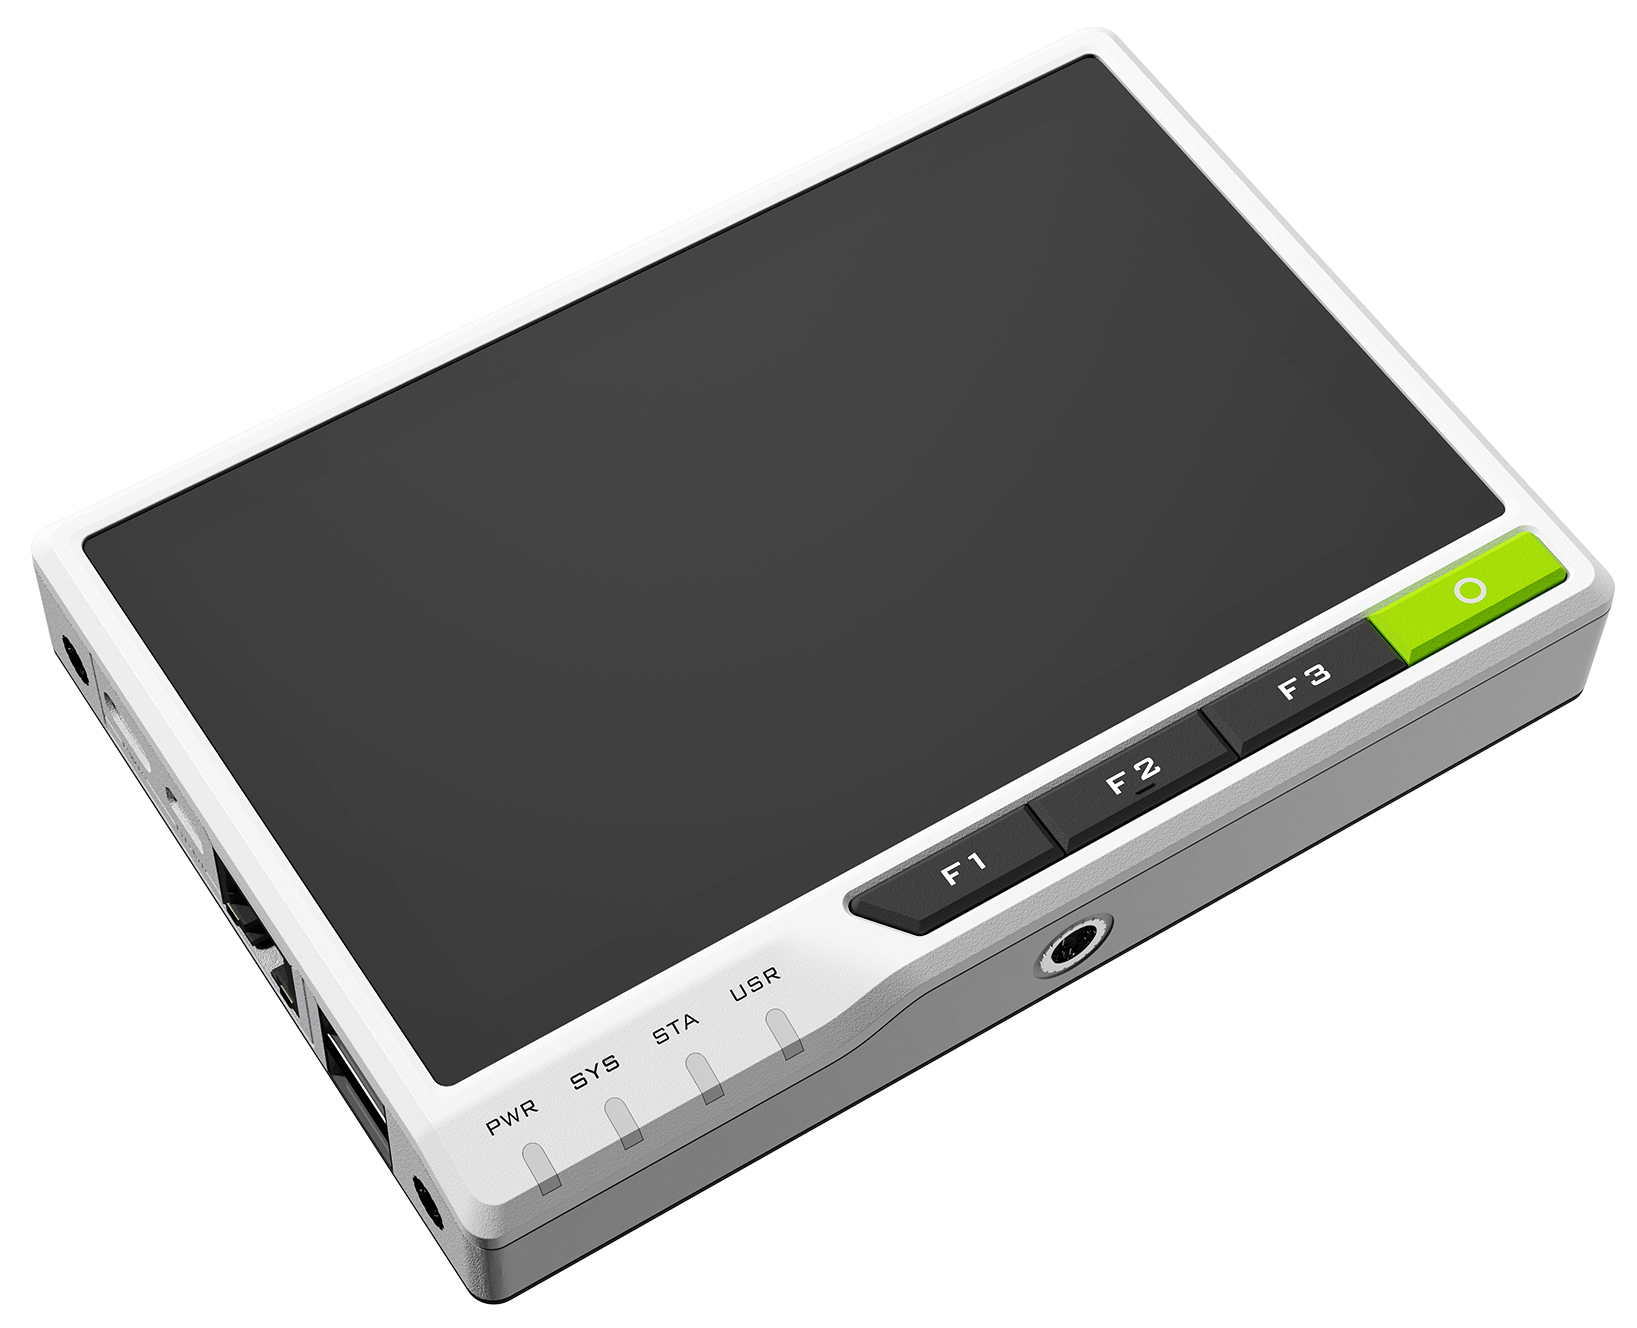
The reTerminal
The reTerminal is marketed as a future-ready Human-Machine Interface(HMI). The reTerminal is powered by a Raspberry Pi Compute Module 4 (cm4) which is a Quad-Core ARM Cortex-A72 CPU running at 1.5GHz and a 5-inch IPS capacitive multi-touch screen with a resolution of 1280x720. 4GB of RAM and 32 GB of eMMC storage are built in (non-expandable). It has wireless connectivity with dual-band 2.4GHz/5GHz Wi-Fi and Bluetooth 5.0 BLE.
You can buy the reTerminal here, current price is USD 195. That includes a Compute Module 4.
See the other article for a more comprehensive overview of the hardware and features.
What you need to do before starting
Please follow along with the previous article on setting up Yocto boot2qt.
This Qt app will not run on the provided Raspbian OS on the reTerminal, since as of the time of writing, the Qt version we're using is newer than the one shipped in that Debian version. You could go ahead and compile Qt 6.2 yourself, but that is out of scope for this guide.
Next, make sure you have installed Qt Creator and Qt version 6.2. The Yocto boot2qt article has instructions for the SDK, which you'll need to crosscompile for the reTerminal.
In Qt Creator, configure the kit as explained in my other guide and configure your reTerminal as a device to deploy to. Once that's all done, come back and continue on.
If you only want to run the WeatherTerminal app on your desktop, you do not need to setup yocto boot2qt for the reTerminal, no need to cross-compile, but you do need to install Qt Creator and Qt 6.2.
You can follow along without a reTerminal, it's a good QML and Qt guide, but the goal of this guide is to build an app for the reTerminal, so keep that in mind.
File -> New
Project
One of the nicest things as a developer is the moment you do File -> New
Project. Blank slate, ready to paint your world. No cruft, legacy or
whatever. So enjoy this moment. Fire up Qt Creator (I'm using version 7) and
execute the magic step.

Make sure to select a Qt Quick (QML) application, select qmake as the build
system and make sure to set the minimum Qt version to 6.2. Select both the
regular Qt6 kit as well as the Yocto SDK provided kit you've built in the
previous article.
Swipe Tab Layout
We'll start by setting up a layout that has two tabs. You can either click on the tab bar or swipe left/right to navigate to another tab.
One tab will be the main weather information page and one tab will be for the Settings. Not that we have much settings, but scaffolding the basic layout is easier now than it is to change it later on.
In the left-side file explorer, navigate to Resources, qml.qrc, / and
open the file main.qml
There should be a basic ApplicationWindow as well as one or more import
statements. The structure of the QML file is simple, a QML file has a single
top-level item that defines the behavior and properties of that component.
If you make a new QML file named, for example, WeatherButton.qml, you could
place that item inside your ApplicationWindow by writing WeatherButton
{}.
In our case, we're going to include a few components to build up the tab layout. Start by adding the following line at the top, to use the Qt Quick Controls:
import QtQuick.Controls
In Qt 5 you had to specify a version number to import, in Qt6 that is no longer required.
Change the width: and height: property values to 1280 and 720, the
reTerminal's screen dimensions. Put something nice in the title and remove
all further content inside the ApplicationWindow component.
Add the following lines:
SwipeView {
    id: swipeView
    anchors.fill: parent
    currentIndex: tabBar.currentIndex
}

footer: TabBar {
    id: tabBar
    currentIndex: swipeView.currentIndex
    TabButton {
        text: "Weather"
        font.pixelSize: 30
    }
    TabButton {
        text: "Settings"
        font.pixelSize: 30
    }
}
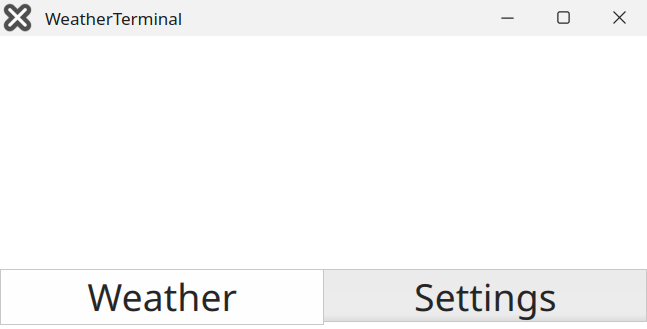
Go ahead and press CTRL+R (or the green triangle that looks like a play button) and behold the wonder you've made:
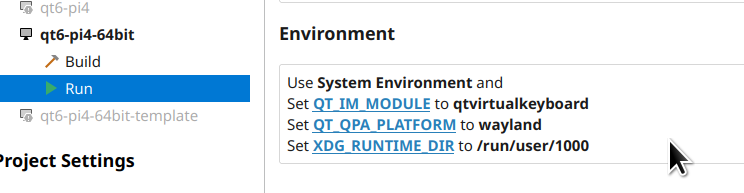
Also try to run it on the reTerminal. If you are using the Wayland + Weston setup to rotate QML apps, add the following to the environment in Qt Creator:
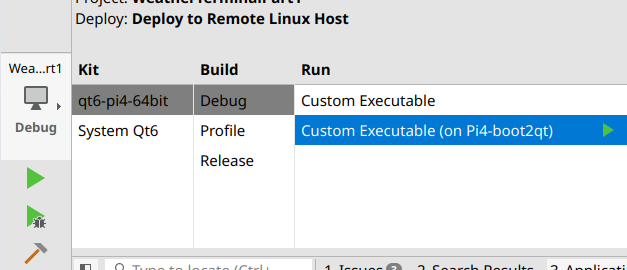
Select the Yocto device kit and the remote device, then press Play to
compile and run it on the reTerminal:
Here's a picture of the reTerminal running our basic blank slate with tabs:

Notice that swiping left or right does not work yet, because the SwipeView
has no actual content yet.
Told you QML was easy, no C++ code required and you have an app with tabs already.
Explaining what we've done so far, starting with the SwipeView:
id: swipeView: the textual id that allows that specific object to be identified and referred to by other objects. This id must begin with a lower-case letter or an underscore, and cannot contain characters other than letters, numbers and underscores.anchors.fill: parent: makes the swipeview anchors to it's parent (the window), effectively resize it to fill the entire window.currentIndex: tabBar.currentIndex: A property binding. Whenever the property valuecurrentIndexof thetabBarupdates, the QML engine automatically updates this property's value as well. Effectively coupling swiping and clicking a tab to each other.
Property bindings are one of the strengths of QML. Without a property binding, in this case you would have to write a function that, whenever you click a tab button, changes the swipeview index (to actually update the swipeview) and vice-versa.
Anchors will be explained in more detail in part two. For now you can think of them as a sort of magnets. One side of an item is anchored to a side of another item. Only parent items or siblings however, for performance reasons.
Next up is the footer: TabBar {}. The footer is actually a property of the
ApplicationWindow The property takes an Item as its value, which is why
you can put an entire TabBar inside it.
Items are visual things from the QtQuick module. Quick stands for
Qt User Interface Creation Kit.
The tabBar has its own id: property and it contains two Items inside
itself, two TabButtons, which also have their own properties:
TabButton {
    text: "Weather"
    font.pixelSize: 30
}
text: contains the text you see on the button and font.pixelSize
is, as you might expect, the size in pixels of the font.
Due to the TabBar doing its own layouting (placing child elements)
on the screen, there is no need to specify x:, y: or anchors:
inside the buttons. The TabBar makes sure they're next to each other.
If you click a button on the TabBar, the currentIndex property changes. If
you click Settings it will become 1. Because the property currentIndex
is bound to the currentIndex property of the swipeView, that swipeview's
currentIndex also becomes 1. In effect this makes the SwipeView change
its current item to whatever is the second child item inside it
(remember, arrays start at 0).
If you are new to Qt, this is a lot of information condensed down to a simple
example. Try to play around, look at what the auto-complete offers for
properties and mess around with that. Try to make the text color red for
example.
Filling the Tabs with Pages
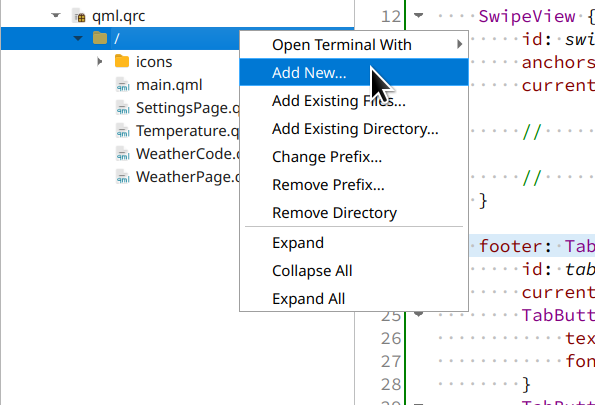
Now that we have the tabs, lets fill them with something useful. Right-click
the / folder inside qml.qrc and create a new QML file, named
SettingsPage.qml:
Paste in the following contents:
import QtQuick
import QtQuick.Controls

Page {
    id: root
    width: 1240
    height: 640

    header: Label {
        text: "Settings"
        font.pixelSize: 50
    }
}
This is an empty placeholder page with just a header. Same as the footer:
property of the ApplicationWindow, the header: property takes an Item
as value, which in this case is a Label. Could also be a Button or
whatever you fancy. The Page control handles the layouting and makes sure
the header: Item is at the top of the page.
In main.qml, inside the SwipeView, add this new component:
  SwipeView {
    [...]
    SettingsPage {}
}
Press Play to test it out and you should now see a header text Settings, on
your Weather tab. Why? Because the SwipeView has only one child item, which
automatically gets index number 0.
Repeat the new QML file creation for another file, name this one
WeatherPage.qml
Add in the same contents as the SettingsPage.qml file, but change the
Label to say Weather and add it to the SwipeView in main.qml, right
above the SettingsPage:
  SwipeView {
    [...]
    WeatherPage {}
    SettingsPage {}
}
Press Play and try again, now you should see Weather as the opening tab. You
can now also swipe right or left, since the SwipeView now has child items.
If you swipe, the current active tab in the tab bar should also change.
Parsing the Open Meteo API
I've chosen the Open-Meteo API because that does not require an API key or user registration and it's free for open source or non-commercial use. It provides a neat JSON API, pass in a LAT and LON and bamm, you get the forecast.
I'll be using the following URL in the app, but if for whatever reason that is unavailable, you can use the (static) mirror on my site here as well. The latter will obviously not contain the current forecast, but it will give you the correct JSON format.
Let's start by defining our own properties inside WeatherPage.qml, right
below the width and height:
property var parameters: undefined
property double latitude: 52.3738
property double longitude: 4.8910
The last two are self explanatory, the first one (parameters) will hold the
decoded JSON. The var type is the anything type in QML. If you know the
type that a property will hold it's faster to specify it (string instead of
var for example). The var type is equivalent to a regular JavaScript
variable. For example, var properties can store numbers, strings, objects,
arrays and functions. Since our parsed JSON will be of the type QJSValue
and there is no more specific QML type to match that, var is our best
choice.
After adding the custom properties, add a function. This is a regular JavaScript function, but it can access QML properties as you will see:
function getJson(latitude, longitude) {
var xmlhttp = new XMLHttpRequest()
var url = "https://api.open-meteo.com/v1/forecast?latitude=" + latitude
+ "&longitude=" + longitude + "&hourly=temperature_2m,relativehumidity_2m,apparent_temperature,weathercode,windspeed_10m,winddirection_10m&daily=weathercode,temperature_2m_max,temperature_2m_min,sunrise,sunset¤t_weather=true&timezone=Europe%2FAmsterdam"
xmlhttp.onreadystatechange = function () {
if (xmlhttp.readyState === XMLHttpRequest.DONE
&& xmlhttp.status == 200) {
root.parameters = JSON.parse(xmlhttp.responseText)
}
}
xmlhttp.open("GET", url, true)
xmlhttp.send()
}
If you've done JavaScript before, the only thing that might stick out is:
root.parameters = JSON.parse(xmlhttp.responseText)
If you're not familiar with JavaScript, this function sends a GET request to
the API URL with a callback method. The callback method checks if the GET
request is finished correctly and if so, parses the JSON response and assigns
the result to the QML root.parameters property. root is the id: of our
Page, the QML engine has complex scoping rules, but for now it's enough to
know that it knows that it has to assign the var to the property parameters
in this file, not in the SettingsPage file even though that page also has
the id: of root. Different file, different context.
Do note that this JavaScript method uses the equals sign (=) and not the
colon (:) to assign a value to the property. The QML colon (:) makes a
property binding, the equals sign (=) does not. So if you would do width =
height inside a JavaScript method, that would not be a property binding,
just an assignment. If height later on changes, width will not. Important
difference, but not that relevant for now.
Let's add a button that calls this method. Below the properties, add the following:
Button {
    id: refreshButton
    anchors.bottom: parent.bottom
    anchors.left: parent.left
    anchors.margins: 5
    text: "Update Weather"
    font.pixelSize: 30
    onClicked: getJson(root.latitude, root.longitude)
}
The two anchors. make the button appear at the bottom left with a little bit
of margin around it (on all sides). The onClicked property calls our
JavaScript method with the two parameters, latitude and longitude, which we
defined as properties of the Page.
If you press Play to compile and run, the button will work but you aren't able
to see the result. The property parameters has the decoded JSON, but we
don't do anything with it yet. To make sure we've done it correctly, lets log
to the console. Below the Button, add the following:
onParametersChanged: console.log(root.parameters['current_weather']['weathercode'])
Compile and run, press the update button and the console log should show something like below:
qrc:/WeatherPage.qml:30: TypeError: Cannot read property 'current_weather' of undefined
qml: 3
The first error is fine, we can ignore that for now. When the property was declared, it was initialized empty, firing off a changed signal, but the onChanged function we wrote does not check if the parameters are empty.
The second line (qml: 3) is the actual weathercode from the JSON API.
Take a moment to enjoy yourself. Without writing any C++ code, you've made a cross platform app with tab bars and a button that gets a JSON API from a network web service. Again, the reason I'm using just QML for this guide is because it's super easy.
Behind the scenes, the onParametersChanged: line is a slot (signal handler)
that is called when the changed signal is fired off from our parameters
variable. Qt has another very powerful concept called signals and slots,
which is kinda like an observer design pattern, or pub-sub, but on steroids
and C++ type safe. I'm not going to explain it any further, I could write a
book just on signals and slots, if you're interested, check out the Qt docs
on it.
Every property, even our custom ones, has a changed signal, the QML engine
creates that for us. That signal is automatically emitted when the value of a
QML property changes. This type of signal is a property change signal and
signal handlers for these signals are written in the form of
onPropertyChanged, where Property is the name of the property, with the
first letter capitalized.
The console.log() function which we've assigned to the onParametersChanged
slot (signal handler) prints the contents of the JSON object
['current_weather']['weathercode'].
Parsing the WeatherCode
Now that we can talk to the JSON API with the click of a button, it's time to
parse that API. We'll start with the current WeatherCode, which is a standard
numeric format for weather conditions, like, Clear Sky or Thunderstorm.
The codes are written out on the Open-Meteo API page and a more comprehensive write up is on the noaa.gov site.
Next to just a textual output, we'll add a nice icon that changes as the weather code changes.
Create a new QML file just as you did before, name it WeatherCode.qml
and paste in the following:
import QtQuick

Item {
    id: root
    property var parameters: undefined
}
In the WeatherPage.qml, add this new component above the Button
we added earlier:
WeatherCode {
    id: weatherCode
    anchors.top: parent.top
    anchors.left: parent.left
    anchors.right: parent.right
    parameters: root.parameters
}
The anchors place this control at the top left of the page and stretch it
out to the right. We'll define the height later on in the control itself. If
a control has no width/height or anchors, it won't be visible. We pass on the
parameters of the WeatherPage down to the WeatherCode. This is a
property binding, so if you click the Update button, the WeatherCode
control also gets the new updated parameters.
Inside your Qt project folder, create a new folder named icons and download
the following svg files from FontAwesome.com:
- circle-question-solid.svg
- clock-solid.svg
- cloud-rain.svg
- cloud-showers-heavy-solid.svg
- cloud-showers-water-solid.svg
- cloud-sun-solid.svg
- poo-storm-solid.svg
- rainbow-solid.svg
- smog-solid.svg
- snowflake-solid.svg
- sun-solid.svg
- temperature-half-solid.svg
- temperature-high-solid.svg
- temperature-low-solid.svg
- wind-solid.svg
These are all part of font awesome free and are CC-BY-4.0 licensed.
In Qt Creator, right click the qml.qrc file in the sidebar and click Add
existing files. Select all icons you've downloaded in the icons folder.
Add a new Image control to the WeatherCode.qml file, below the properties:
Image {
    id: weatherCodeIcon
    source: root.parameters ? weathercodeToIcon(
                                      root.parameters['current_weather']['weathercode']) : "qrc:icons/circle-question-solid.svg"
    asynchronous: true
    anchors.top: parent.top
    anchors.left: parent.left
    anchors.margins: 5
    width: 90
    height: width
}
You should get more familiar with the QML syntax by now. Height is a property
binding to width, the anchors place this in the top left with a bit of
margin around it. The asynchronous property tells the QML engine to not
block while loading this image. With one image it's not a bottleneck, but
with more images you quickly realize why you want all images to load async
(because the UI blocks, is unusable, freezes).
The source: property is more complex and introduces you to a widely used QML
concept, the ternary if statement. If root.parameters is filled
(not undefined), then do whatever is after the question mark (?). If not,
do whatever is after the colon (:). This could also be written (in pseudo
code) as:
if(root.parameters !== undefined); then
    source = weathercodeToIcon(root.parameters['current_weather']['weathercode'])
else
    source = "qrc:icons/circle-question-solid.svg"
We've defined parameters as undefined, so as long as we have not clicked
the Update button, it will show a question mark icon. If we do call the
update function, a parametersChanged signal will fire off and this
property binding will be re-evaluated.
The weathercodeToIcon() function contains the following code. Paste it right
below the properties in this file:
function weathercodeToIcon(weathercode) {
    switch (weathercode) {
    case 0:
        return "qrc:icons/sun-solid.svg"
    case 1:
    case 2:
    case 3:
        return "qrc:icons/cloud-sun-solid.svg"
    case 45:
    case 48:
        return "qrc:icons/smog-solid.svg"
    case 51:
    case 53:
    case 55:
    case 56:
    case 57:
    case 61:
    case 80:
        return "qrc:icons/cloud-rain.svg"
    case 63:
    case 66:
        return "qrc:icons/cloud-showers-solid.svg"
    case 65:
    case 67:
        return "qrc:icons/cloud-showers-water-solid.svg"
    case 71:
    case 73:
    case 75:
    case 77:
    case 85:
    case 86:
        return "qrc:icons/snowflake-solid.svg"
    case 81:
    case 82:
        return "qrc:icons/cloud-showers-heavy-solid.svg"
    case 95:
    case 96:
    case 99:
        return "qrc:icons/poo-storm-solid.svg"
    default:
        return "qrc:icons/rainbow-solid.svg"
    }
}
As you can see, nothing special, just a big switch statement. For each series of weather code values, return a different icon.
Next to the image and above the parsed weather code text, I want a
small header. Let's add that in, paste this above the Image:
Text {
    id: weatherHeaderText
    text: "Current Weather"
    anchors.top: parent.top
    anchors.left: weatherCodeIcon.right
    anchors.leftMargin: 20
    horizontalAlignment: Text.AlignLeft
    verticalAlignment: Text.AlignTop
    font.pixelSize: 18
}
Here is a new thing, anchors.left: weatherCodeIcon.right. This means, that
the left side of the text object should be anchored to the right side of the
icon. Add a bit of leftMargin to make it beautiful and you're done. Now,
wherever you place the icon, right next to it will always be this text. If
you move the icon around, you do not need to manually update the x: or y:
of the Text, it's all done automatically for you.
At the top of the file, right below the id:, add a new property
for the height of this control:
Item {
    id: root
    height: weatherCodeIcon.height
    [...]
Another property binding, that makes this entire control as high as the image
icon is. We've anchored the WeatherCode in WeatherPage at the top,
left and right, but not the bottom. If we wouldn't set a height, the
item would be invisible.
Go press Play and run the code. Click the Update button and the icon
should change from a question mark to whatever the current weather code
is, which we mapped in the weathercodeToIcon switch statement:
To finish off the weather code control, let's add the current weather text as
well. Almost the same as the weathercodeToIcon function, we now make a
weathercodeToText function, with another big switch. Add it below the
other function:
function weathercodeToText(weathercode) {
    switch (weathercode) {
    case 0:
        return "Clear sky"
    case 1:
        return "Mainly clear"
    case 2:
        return "Partly cloudy"
    case 3:
        return "Overcast"
    case 45:
        return "Fog"
    case 48:
        return "Fog (Depositing rime)"
    case 51:
        return "Light Drizzle"
    case 53:
        return "Moderate Drizzle"
    case 55:
        return "Dense Drizzle"
    case 56:
        return "Light Freezing Drizzle"
    case 57:
        return "Dense Freezing Drizzle"
    case 61:
        return "Slight Rain"
    case 63:
        return "Moderate Rain"
    case 65:
        return "Heavy Rain"
    case 66:
        return "Light Freezing Rain"
    case 67:
        return "Heavy Freezing Rain"
    case 71:
        return "Slight Snowfall"
    case 73:
        return "Moderate Snowfall"
    case 75:
        return "Heavy Snowfall"
    case 77:
        return "Snow grains"
    case 80:
        return "Slight Rainshower"
    case 81:
        return "Moderate Rainshower"
    case 82:
        return "Violent Rainshower"
    case 85:
        return "Slight Snowshowers"
    case 86:
        return "Heavy Snowshowers"
    case 95:
        return "Thunderstorm"
    case 96:
        return "Thunderstorm with slight hail"
    case 99:
        return "Thunderstorm with heavy hail"
    default:
        return "Rainbows!"
    }
}
Below your Image, add a new Text control:
Text {
    id: weatherCodeText
    text: root.parameters ? weathercodeToText(
                                root.parameters['current_weather']['weathercode']) : "Loading weather, please press update"

    anchors.bottom: weatherCodeIcon.bottom
    anchors.left: weatherCodeIcon.right
    anchors.leftMargin: 20
    horizontalAlignment: Text.AlignHCenter
    verticalAlignment: Text.AlignBottom
    font.pixelSize: 50
    wrapMode: Text.WordWrap
}
What this control does should be no surprise anymore. We anchor it right
next to the icon image and, if the parameters are defined, pass them to our
weathercodeToText function, which returns the current weather. If there are
no parameters yet, it says Loading Weather, please press update.
Remember, the full code can be found on my GitHub, so you can check if you've followed along correctly by comparing your QML file to mine.
Now that we have the weather code parsed, lets continue on to the temperature. Looks an awful lot like this part, without the large JavaScript parsing methods, since it's just a number.
Temperature
Create a new QML file as you've done before, name it Temperature.qml. Paste
in the empty Item template. I'm including the height and the
parameters, because we've already covered that in the previous part:
import QtQuick

Item {
    id: root
    height: temperatureIcon.height
    property var parameters: undefined

}
Since I want this control to look like the WeatherCode, this one has the same
layout, an icon and a small header text. This time there is no difference in
the icon, so no JSON parsing. Paste it below the parameters:
Image {
    id: temperatureIcon
    source: "qrc:icons/temperature-half-solid.svg"
    asynchronous: true
    anchors.top: parent.top
    anchors.left: parent.left
    anchors.margins: 5
    width: 90
    height: width
}

Text {
    id: apparentTemperatureText
    text: "Apparent Temperature"
    anchors.top: parent.top
    anchors.left: temperatureIcon.right
    anchors.leftMargin: 20
    horizontalAlignment: Text.AlignLeft
    verticalAlignment: Text.AlignTop
    font.pixelSize: 18
}
The above QML code should be familiar to you, since there is nothing we haven't done before in this guide.
If you want to, you could parse the current apparent temperature, and if it's higher or lower than a set amount, show a different temperature icon. For everything under 10 degrees Celsius, show the temperature-low-solid.svg icon, for everything above 20 the temperature-high-solid.svg and everything in between the temperature-half-solid.svg. How to do is left as an exercise for the reader, but with the examples in the previous weathercode paragraph, that should not be difficult.
I've chosen the apparent temperature as opposed to the regular temperature,
mostly because the JSON API does not expose this variable in the
current_weather JSON structure, so we have to parse the hourly part of
the JSON. Otherwise, this example would be very much the same as the
weathercode, which would be boring. And of course, the apparent temperature
is more useful if you hang the reTerminal in your hallway, to know what coat
to put on. It could be 10 degrees but sunny and no wind, which feels warmer,
or 15 degrees with icy winds, which feels way colder. So for the purpose of
the reTerminal there, the apparent temperature is more applicable.
The API docs say the following, regarding the format and hourly data:
Time always starts at 0:00 today and contains 168 hours.
If we can get the current hour of the day, we can select that field from the JSON object and get the temperature for the current hour. Here is a condensed JSON output:
{
    [...]
    "hourly_units": {
        "apparent_temperature": "degC",
    },
    "hourly": {
        "apparent_temperature": [-1.9, -2.4, -3.2, -3.3, -3.3, [...] ],
    }
}
The field [hourly][apparant_temperature] is a list. Hour 0 of the current day
has apparent temperature -1.9 degrees Celsius. Hour 1 has -2.4 and so forth.
In our QML file, when the parameters contain JSON, the syntax to access hour
1 is like below:
root.parameters['hourly']['apparent_temperature'][1]
A quick JavaScript function to get the current hour is below:
function currentHour() {
    const date = new Date()
    return date.getHours()
}
Combining the two, the below code results in a property that has
the current hours temperature:
property double currentTemperature: root.parameters['hourly']['apparent_temperature'][currentHour()]
In this case I don't check for parameters being undefined, because I'll
check that later on in the Text control. Otherwise you'd have a magic
number there, like 999 or whatever. Not the most expressive way.
The API also exposes the units the data are in, as the above example also shows. You can access that like you can access the other items:
property string currentTemperatureUnit: root.parameters ? root.parameters['hourly_units']['apparent_temperature'] : ""
Combining the above properties into a Text control:
Text {
    id: currentTemperatureText
    text: root.parameters ? currentTemperature + "<small> "
                            + currentTemperatureUnit + "</small>" : "..."

    anchors.bottom: temperatureIcon.bottom
    anchors.left: temperatureIcon.right
    anchors.right: parent.right
    anchors.leftMargin: 20

    horizontalAlignment: Text.AlignLeft
    verticalAlignment: Text.AlignBottom
    font.pixelSize: 54
    minimumPixelSize: 45
    textFormat: Text.RichText
}
One new property is textFormat. When setting this to Text.RichText you can
use HTML. You can also use Text.StyledText for some basic HTML, but that
does not include the <small> tag. I like how it looks when the unit is
smaller than the number.
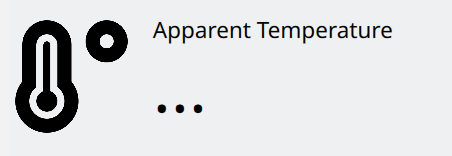
Here's how the finished control looks when you have not yet clicked update:
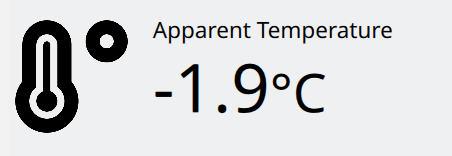
Here is how it looks when you do have updated the JSON:
Add the control to the WeatherPage.qml file, right below
the WeatherCode {}:
Temperature {
    id: temperature
    anchors.top: weatherCode.bottom
    anchors.topMargin: 30
    anchors.left: parent.left
    anchors.right: parent.right
    parameters: root.parameters
}
The same as earlier, but now this control is anchored to the weatherCode
bottom with a bit of margin.
Finishing part 1 up
The basics are all in place, you're parsing JSON and showing the data on your
own custom controls. Well done! To finish up part 1, let's add two more
buttons. One to quit the app and one to load example JSON. The Quit button
makes the app restart via systemd on the reTerminal, can be handy.
The example button is one I find useful. I put the entire JSON data string in
a string property named exampleJson:
property string exampleJson: '{"generationtime_ms":2.30...
The button has this method as the onClicked property:
root.parameters = JSON.parse(exampleJson)
This saves you a network call in testing and gives you the same data every time. Plus it saves overloading the API.
Here are the two buttons:
Button {
    id: exampleButton
    anchors.bottom: parent.bottom
    anchors.left: refreshButton.right
    anchors.margins: 5
    text: "Example JSON"
    font.pixelSize: 30
    onClicked: root.parameters = JSON.parse(exampleJson)
}

Button {
    id: quitButtom
    anchors.bottom: parent.bottom
    anchors.left: exampleButton.right
    anchors.margins: 5
    text: "Quit"
    font.pixelSize: 30
    onClicked: Qt.callLater(Qt.quit)
}
The finished result looks like this:
Give yourself a pat on the back because you've done a great job. In the next part we'll add the wind speed and direction (useful on the bicycle), persistent settings, the weather for the next few hours and the Qt Virtual Keyboard:
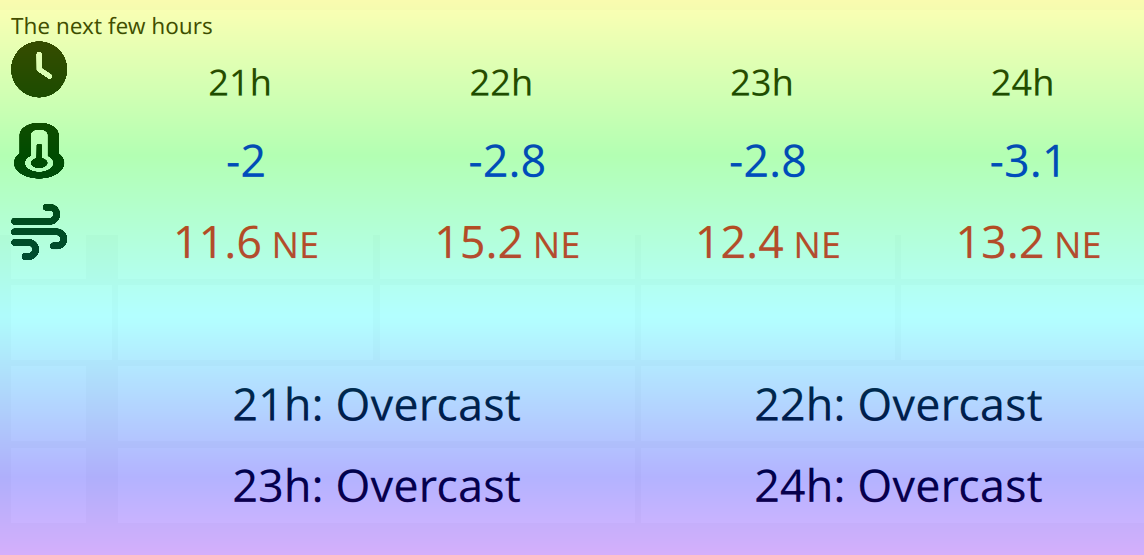
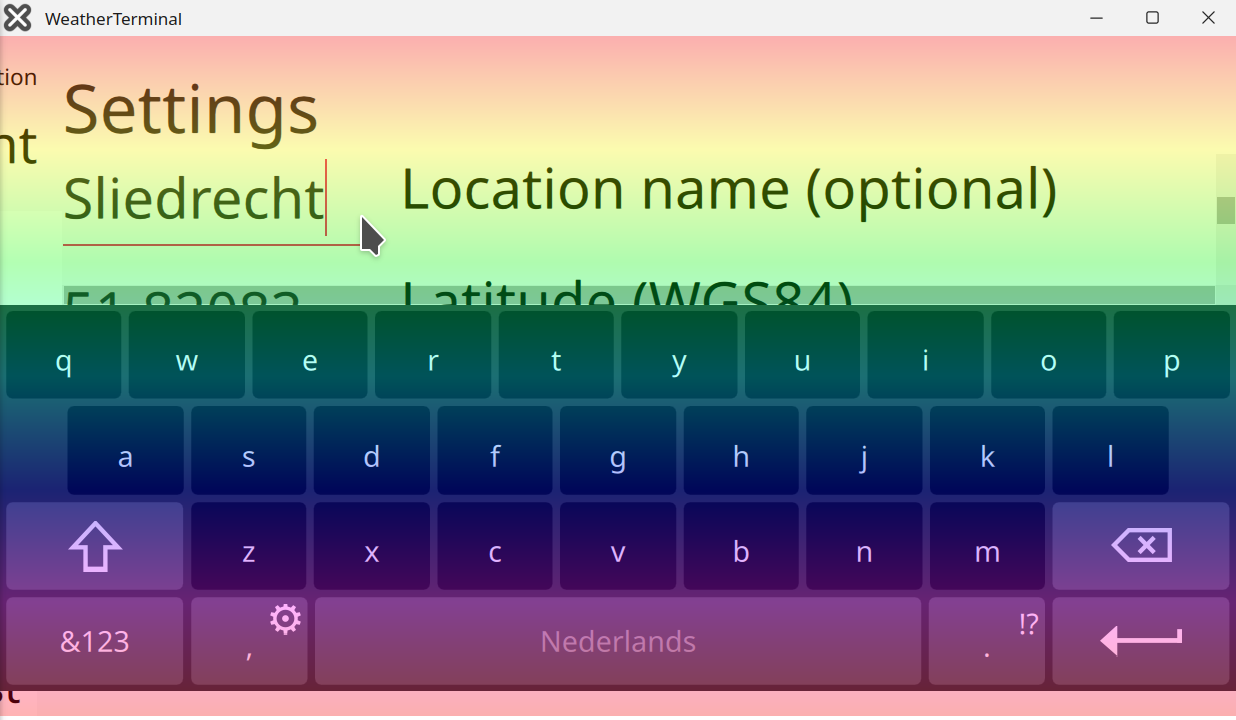
The table involves more advanced anchoring and a Layout, the Qt Virtual
Keyboard also includes Yocto configuration to make sure the reTerminal builds
the module.